Event Maps

Overview

Event Stream is a platform service used by Marigold applications and microservices to exchange event data with one another in real time. Event Stream broadcasts new events to other Marigold products that subscribed to the type of event.

Engage+ streams campaign related events,some of which are readily available out-of-box to use and others must be configured. Event Stream categorizes types of events into a consistent schema. This provides all Marigold apps with context for what the event is, and makes it easier to determine data for further processing.

Events are categorized by Event Types. An Event Type is a way of grouping all similar events (e.g. a purchase), and Engage+ Event Stream has a list of pre-defined Event Types. Event Maps are used to trigger events when data is added or updated in Engage+. Multiple triggers can be mapped to an Event Type using different Event Maps, for instance, when there are multiple online stores, multiple triggers can be mapped for a Purchase Event.

Note: Event Map is not enabled by default. If you would like this feature enabled on your account, contact your Marigold representative, so they can configure access and set up relevant Event schema and Event Types.


Access

The Event Map screen is accessible by the following method:

Features

 Create a New Event Map

Click hereClick here

To create an Event Map:

  1. Above the list of existing Event Maps, click + New button.

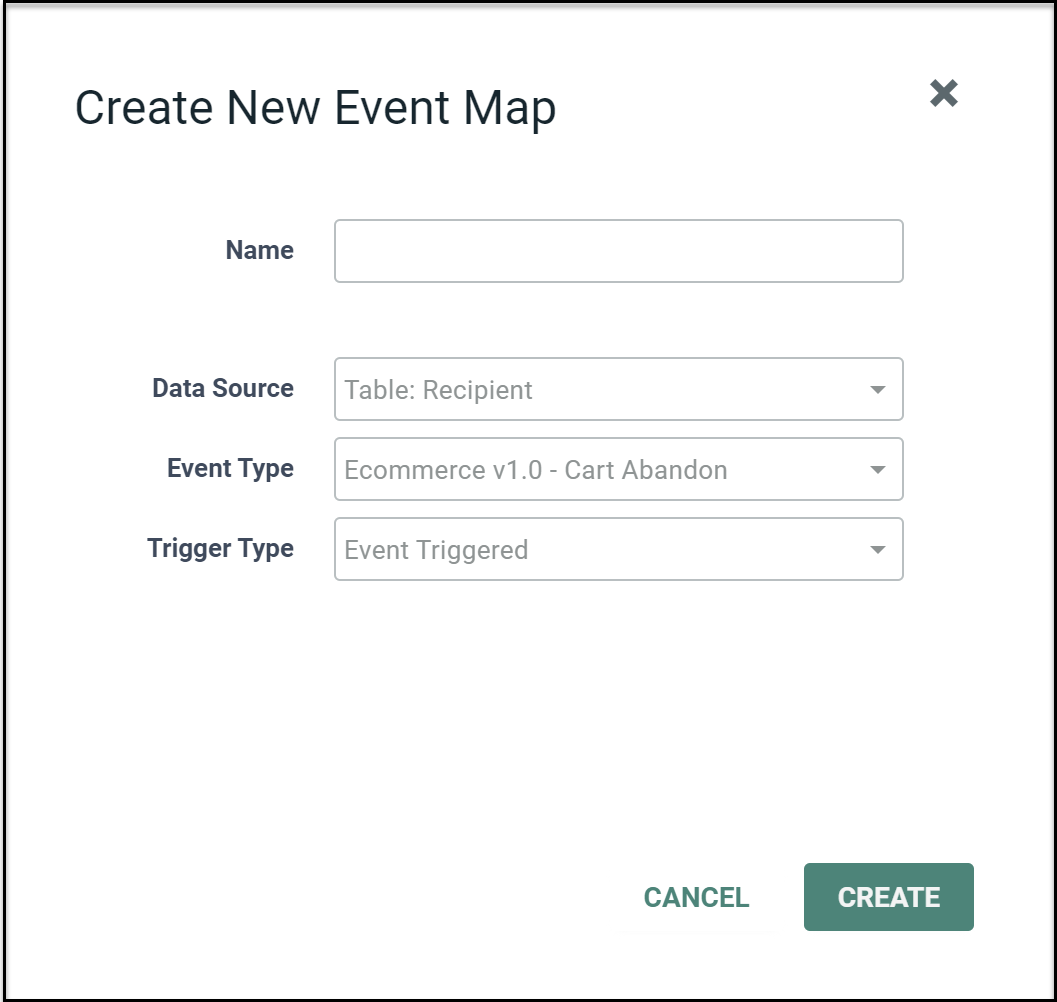
  2. A "Create New Event Map" pop-up window is displayed. 

    View New Event Map Pop-up windowView New Event Map Pop-up window 


  3. Enter the Event Map values:

  • Name: Your unique Event Map name

  • Data Source: The data source or table you wish to use. For more information see Tables.

  • Event Type: Select the type of event you wish to use. You can select from the list of Event types configured for your account. 

    The following Event types are supported which can be broadly categorized into Ecommerce and Moments.


    Ecommerce

    Moments

    Ecommerce ecommerce_cartadd ecommerce_cartremove ecommerce_cartabandon ecommerce_cartempty ecommerce_purchase ecommerce_ordership ecommerce_orderdeliver ecommerce_orderreturn ecommerce_itemreview ecommerce_customerservicereview ecommerce_orderdelay

    Moment_signup moment_cancelation moment_milestone moment_service_disruption moment_service_resumed moment_social_interaction moment_entered_geo momement_exited_geo

  • Trigger Type: Select Event Triggered or Date Triggered. For more information on how the mechanism works, see Campaign Types.

  1. Select Create. An Event Map is created and the Edit page is displayed. Some of the options on the Edit page will depend on the Trigger Type selected.

  2. Now set your Configuration options and data mapping as explained below.

  3. In the Tool Ribbon, click Edit > Save.


 Edit Configuration

Click hereClick here

You can configure the following settings in an Event Map:

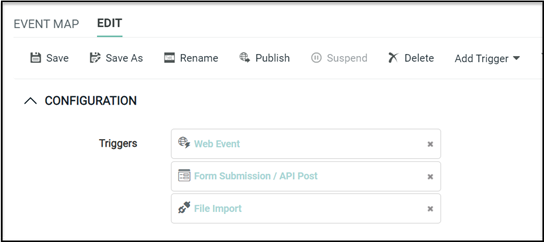
View Event Map ConfigurationView Event Map Configuration

  1. In an Event-triggered Event Map, click Add Trigger button and select the trigger type to be added. You can also select multiple triggers if needed. See  Event Trigger Options for more information. Five trigger types are supported:

  • API Post

  • Entity Update

  • File Import

  • Form Submission and

  • Web Event


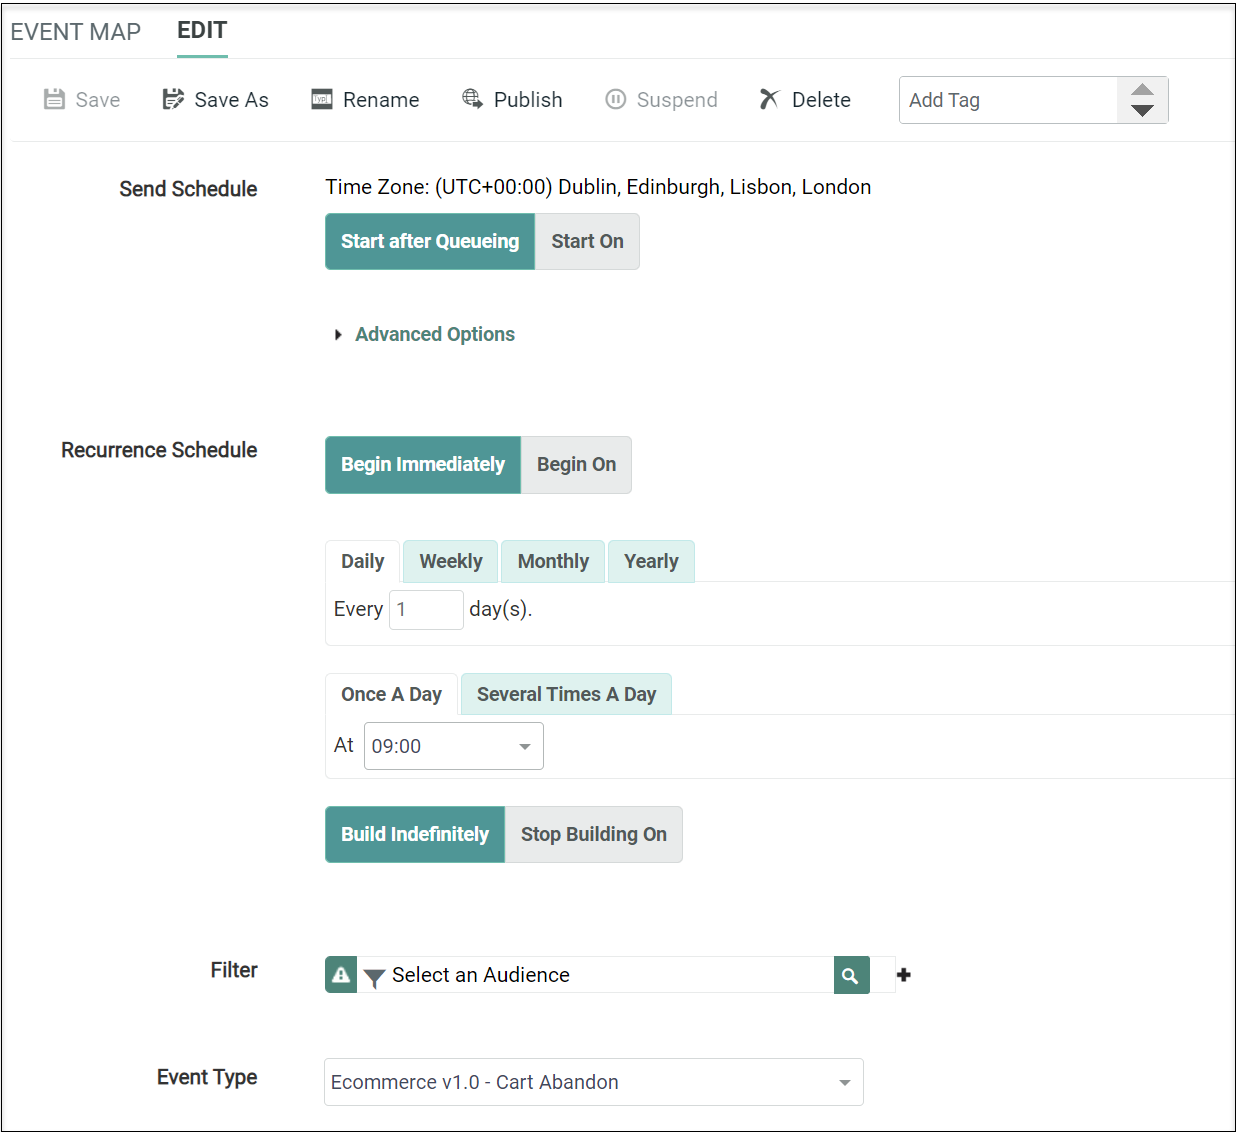
  1. In a Date-triggered Event Map, you can set the Send Schedule and Recurrence Schedule.

     View Event Map Schedule SettingsView Event Map Schedule Settings

    Send Schedule: Select Start after Queueing to schedule the Event Map immediately when ready or, if you want to set a custom start date / time at some point in the future, select Start on, then enter the start date and time for the Send Schedule.

    Recurrence Schedule: Select Begin Immediately if you want the Recurrence Schedule to go live immediately when the Event Map is published. If you want to set a custom start date / time at some point in the future, select Begin on, then select a date and a time. You can set the Recurrence Schedule frequency to be either daily, weekly, monthly or yearly. You can also set the schedule end date and time. See Schedule a Date-triggered Campaign in Campaign review for more information.

  2. Click Filter to add a filter. Click the Search button to search for an existing filter or click Add to create a new filter. A filter is required for Date-triggered Event Map and optional for an Event-triggered Event Map. See Filters for more information.

  3. You can change the Event Type at any time. However, the Event Map will not retain all the defined data field values.

  4. In the Tool Ribbon, click Edit > Save


 Edit Map Data

Click hereClick here

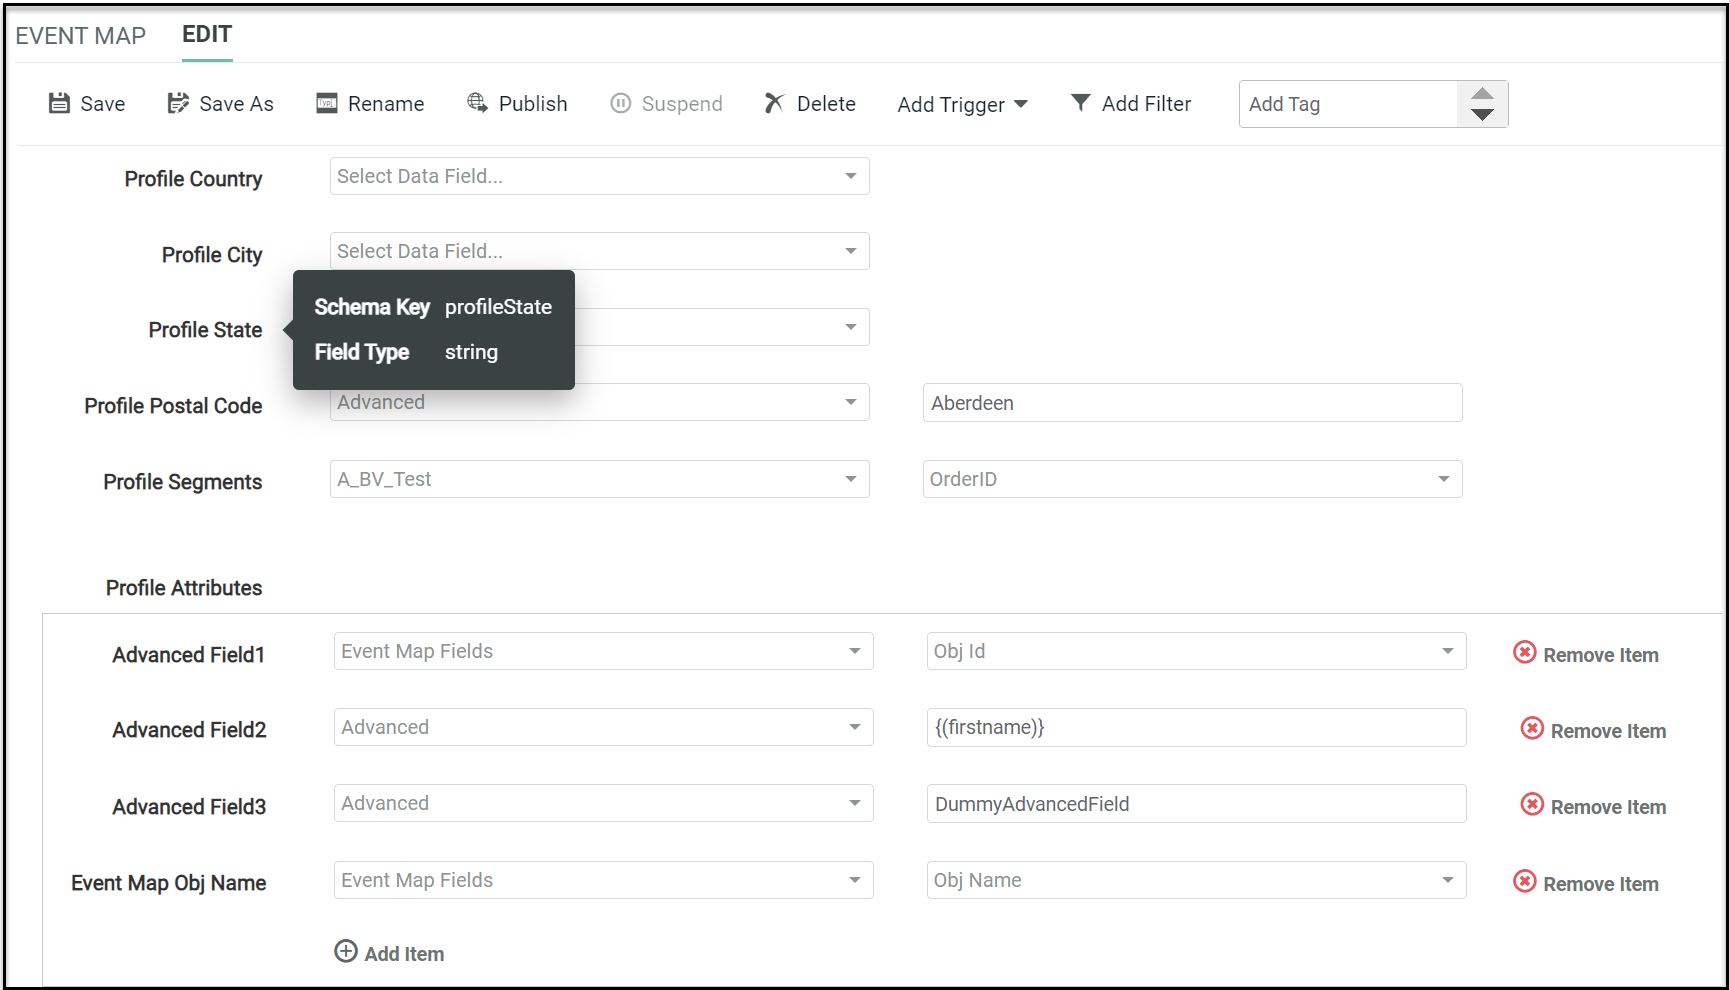
Mapping Events is a process of linking the Map Data to your Data source, Event map fields and any joins in your table. See TablesTable - Working with Joins for more information. The Map Data is displayed based on the Event Type selected during Event Map creation. The field type of the Map Data allows different types of linking. To know the Schema Key and Field Type of the data field for mapping, you can hover over the data field.

View Map DataView Map Data

The field types String, Integer, Number and Boolean allow you to set the Map Data to data source fields, Event Map fields or a constant string.

  1. For these Map Data fields, select the corresponding table column from the list, to be mapped. The table columns correspond to the data source table setup during Event Map creation.

  2. Alternatively, you can select Event Map Fields or Advanced options from the list.

  3. Select the Event Map list to map the data field to a predefined set of Event Map fields. The list includes:

  • Customer Id

  • Parent Customer Id

  • Customer Name

  • Ref Id

  • Obj Id

  • Obj Name

  • Event Map Type Code

  • Obj Type Id

  • Obj Type Name

  1. Select the Advanced option to enter a value in the textbox.

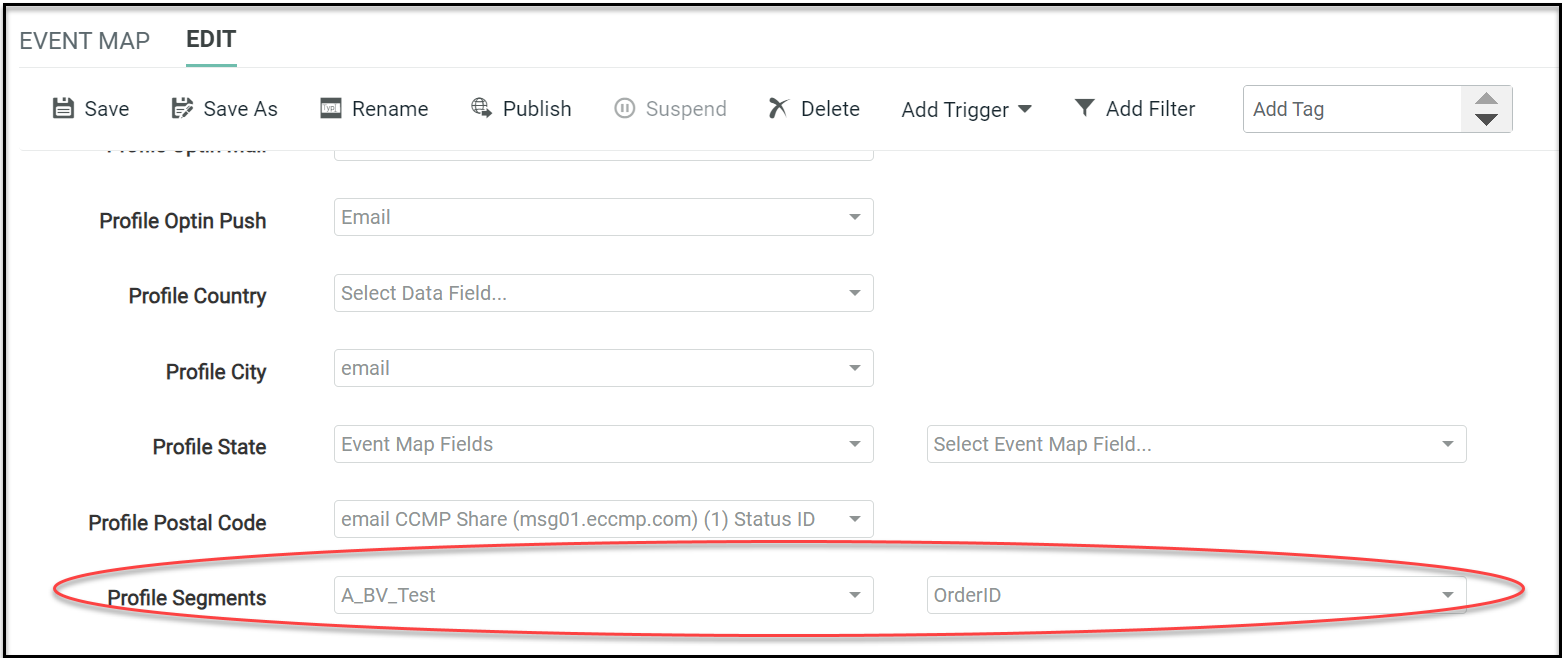
The field type Array allows you to set the Map Data to data arrays from the data source table or another table that joins this table.  

  1. Select the required table from the list, The data fields from the selected table is displayed for selection.

  2. Select the data field to be mapped.

In the above example, there are two values sent for the OrderID since two order IDs were tagged to this customer.

The field type Object provides the Add Item option to add new fields dynamically. To add a new item: 

  1. Click Add Item.

  2. Enter New item name in camel case (advancedField1) in Key.

  3. Select the type of the data field.

  4. Select the value for the item from the list: a constant string, an event map field, or data source column.

  5. Click Save to add the new field.

For example,

  • Advanced Field1 is an event map field set as an Advanced field. In this case, the field is set to “{(eventmap:obj_id)}”.

  • Advanced Field2 is a column of the table or data source. In the message, the first name of the customer is sent.

  • Advanced Field3 is a constant string set as an Advanced field. Click Save, to save the Map Data. Note: If you change to another Event Type in Edit tab, the Event Map will not retain all the data field values.

 In the Tool Ribbon, click Edit > Save.

Note: If you change to another Event Type in Edit tab, the Event Map will not retain all the data field values.  


 Copy an Event Map

Click hereClick here

To copy an existing item to use as the basis for a new item:

  1. Search for the desired item (see Search for an Item for more details).

  2. Click on the item name. The main item screen is displayed and populated with the details of the selected item.

  3. In the Tool Ribbon, click Edit > Save As. A "Save as" dialog box is displayed.

  4. Enter a name for the new item.

  5. By default, the new item will be saved in the same folder location as the base item. Optionally, click the magnifying glass icon to browse to and select a different folder location.

  6. Click Save A Copy. The system creates a copy of the selected item.


 View or Edit an Event Map

Click hereClick here

To view or edit an Event Map:

  1. Search for the desired Event Map (see Search for an Item for more details on the available search methods).

  2. Click on the Event Map name. The Event Map screen is displayed and populated with the details of the selected Map.

  3. Optionally, to view detailed information, click the Event Map tab in the Tool Ribbon. The Item Details screen is displayed, showing who created the item, who modified it last, and what the last actions taken on the item were. On this screen, click "Related Items" in the Function Menu to see other items in the system that reference or utilize this Event Map. When finished, click the Edit tab in the Tool Ribbon to return to the main edit screen.

  4. Optionally, you can assign one or more tags to your Event Map. To assign a tag, click on the "Add tag" field in the Edit section of the Tool Ribbon. The system displays a pop-up menu of all the existing tags. You can select one of these tags, or type in a new one and press Enter. You can repeat this process to add more tags. To remove a tag, click the "X" icon next to the tag label.  

  5. Optionally, to rename the Event Map, click Edit > Rename. A "Rename Item" dialog box is displayed. Enter a new name, then click Save New Name

  6. Optionally, make any necessary changes to the Configuration and Map Data.

  7. When finished, click Edit > Save in the Tool Ribbon.


 Publish an Event Map

Click hereClick here

After you've created the Event Map, you must publish it to make it live.  

In the Tool Ribbon, click Edit > Publish This will create a campaign and all its other related objects, and then the Campaign is published. 

The Event Map mode will be updated to “Published”. In “Published“ mode, you can only Save As, Suspend and Delete an Event Map.  


 Delete an Event Map

Click hereClick here

To delete an item:

  1. Search for the desired item (see Search for an Item for more details).

  2. Click on the item name. The main item screen is displayed and populated with the details of the selected item.

  3. In the Tool Ribbon, click Edit > Delete. A confirmation dialog box is displayed.

  4. Click Delete Item to confirm the deletion.

Foldered items are moved to the Recycle Bin. Non-foldered items are permanently deleted.