This kit supports the following:
- Reward Detail View
- Navigation to different Reward Types
- Custom Responder Views for each of the Rewars Types
- Reward Redemption Flow
- Redemption Detail View
- Redemption using Awards
Configuration
Rewards Kit doesn’t have an additional configuration requirement. Once the Loyalty Core Kit configuration is satisfied, the kit can be used as intended.
Localization
To replace or override a string, add the string key in your application’s Localizable.strings and provide a new value. See all string keys used in Rewards Kit Localization.
Usage
The Kit uses a direct Detail-Responder flow with an assumption that an access token is already granted. To know more about access tokens and authentication, see Getting Started for the initial setup.
Setup
-
Import frameworks to use its components
import CheetahDigitalRewards -
Instantiate
RewardDetailContentControllerandRewardDetailViewControllerwith aRewardID provided.let sampleRewardID = 230 let rewardDetailController = RewardDetailController(id: sampleRewardID) let rewardDetailViewController = RewardDetailViewController(detailController: rewardDetailController)
Features that require App-Side Implementation
-
Provide an Image Loader
CheetahImageLoader.default = AppSideImageLoader()The
AppSideImageLoaderis a class which implements the loading of an image conforming to the methods provided byImageLoader. This will be used to diplay images on the Detail Screen and some of the Responder Views. See Loyalty UI Kit for the complete steps on how to implement the Image Loader. -
Provide the countries and states by saving the data in User Defaults using the key:
CountriesCollectionController.defaultsKeySee Loyalty UI Kit for the full implementation. For this Kit, these countries and states will be used for the Shipping View Address when redeeming a Physical Product Reward.
-
To fully support Challenge Reward Type, override the
navigate(toChallenge: challenge)method.override func navigate(to challenge: Challenge) { let controller = ChallengeDetailController(id: id) let detail = ChallengeDetailViewController(detailController: controller) detail.showModally() }
Components
Default Detail View
RewardDetailViewController
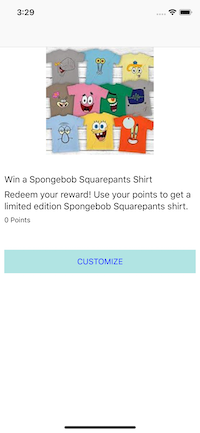
A Detail View which contains an image, labels and a button which navigates to a Responder View depending on the type of the reward. These are the supported types of rewards in this kit:
badgecertificatechallengecontestcoupondebitcouponComgiftcardmetricmetricPurchasemetricTransferofferproductdynamic
RedemptionDetailViewController
A Detail View that displays the reward detail after redemption.
Default Responder Views
Generic Reward Types
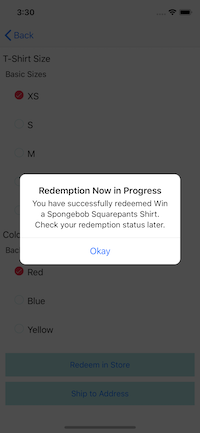
Shows a loading view upon tapping the action button and an alert message upon redemption. Most of the reward types uses this kind of Responder method except from Certificate, Challenge, Metric Transfer and Physical Product

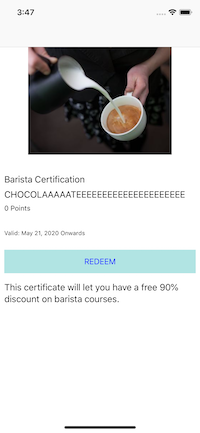
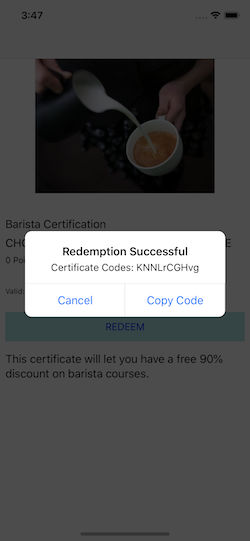
Certificate Reward Type
Almost the same as the generic types except that upon redemption, the certificate code is displayed and can be copied.
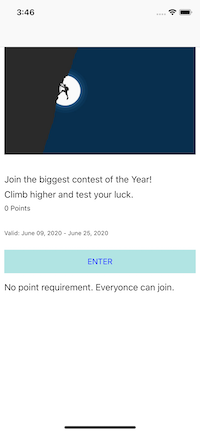
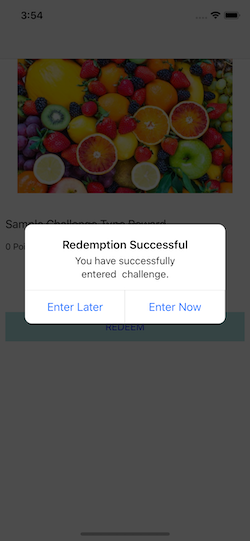
Challenge Reward Type
Almost the same as the generic types that shows an alert upon redemption. However, upon tapping the alert button, the expected behavior is to navigate the user to the target Challenge Detail. Note that the navigation isn’t included on this kit. The implementation to fully support the functionality is included in the setup instructions. See Additional Setup on how to implement the navigation on the app-side.
Metric Transfer Reward Type
Displays a view with a slider for choosing the desired amount to transfer.
![]()
![]()
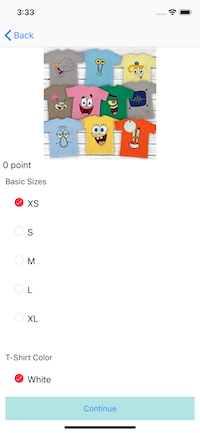
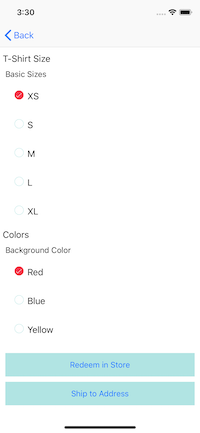
Physical Product Reward Type
Allows user to pick different product attributes depending on the configuration of the reward object. It also includes an option whether to ship the reward or claim it in-store. See Additional Setup for the Shipping Address requirement.

Awards
Rewards can be redeemed using awards. The same flow, functionality and default views follows, just provide the awardId upon initialization of the Reward Detail.
let rewardDetailController = RewardDetailController(id: 234, awardId: 345)
let rewardDetailViewController = RewardDetailViewController(detailController: rewardDetailController)
Customization
If the provided default implementations do not satisfy your application’s requirements, you have 3 options for customization.
- Subclass the default classes and override its methods and/or properties you wish to modify.
- For protocols
RewardResponderandRewardResponderFactoryyou can create your own classes that conform to those protocols and use it instead of the defaults. - You can use a combination of your custom classes and the default classes.