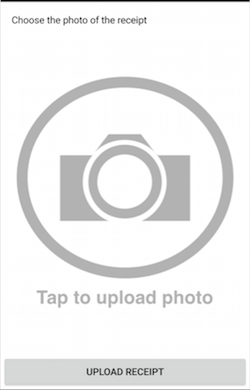
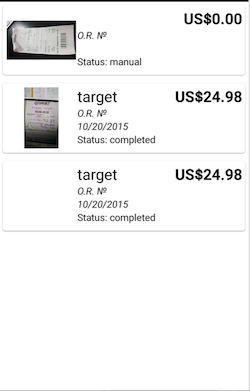
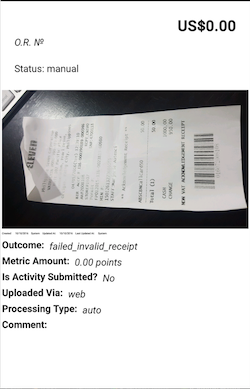
The Receipts kit lets a brand capture online and in-store purchase receipts. Members can accrue points and receive prizes for submitting receipts.
Receipts can use a variety of member attributes – member ID, email, phone number, member card number, or member integration ID – to identify the member for an incoming receipt.
On this page:
Overview
The Receipts kit contains these features - Upload Receipts , Show History of Uploaded Receipts and Show Details of Uploaded Receipts.
Upload Receipts enables users to upload a receipt to the server.

Show History of Uploaded Receipts displays the history of uploaded receipts of the user.

Show Details of Uploaded Receipts displays the details of uploaded receipt of the user.

To include the Receipts kit, open the Gradle Scripts | build.gradle (Module: app) and add the following to the
dependencies section:
implementation 'com.cheetahdigital.android:receipts:<version>'
Launching the Upload Receipts
Assuming that the Upload Receipts module will be launched from a MainActivity, you can follow these steps to launch the SubmitReceiptActivity from a Button’s OnClickListener:
-
Add the
SubmitReceiptActivityto theAndroidManifest.xml:<activity android:name="com.cheetahdigital.receipt.ui.submit.SubmitReceiptActivity"> <intent-filter> <action android:name="${applicationId}.RECEIPT_SUBMIT" /> <category android:name="android.intent.category.DEFAULT" /> </intent-filter> </activity> -
You also need to declare the camera and write external storage permission in your
AndroidManifest.xmlfor uploading a receipt image.<uses-permission android:name="android.permission.CAMERA"/> <uses-permission android:name="android.permission.WRITE_EXTERNAL_STORAGE"/> -
In your
MainActivity, add a Button to launch the starting Activity -SubmitReceiptActivity:button.setOnClickListener(new View.OnClickListener() { @Override public void onClick(View v) { startActivity(new Intent(Actions.Receipt.getReceiptSubmitAction(MainActivity.this))); } });
Launching the History of Uploaded Receipts and its details
Assuming that the History of Uploaded Receipts module will be launched from a MainActivity , you can follow the succeeding steps to launch the ReceiptListActivity from a Button’s OnClickListener:
- Add the following Receipt Activities to the
AndroidManifest.xml:ReceiptListActivityReceiptDetailsActivity
<activity android:name="com.cheetahdigital.receipt.ui.list.ReceiptsActivity" /> <activity android:name="com.cheetahdigital.receipt.ui.detail.ReceiptDetailsActivity"> <intent-filter> <action android:name="${applicationId}.RECEIPT_DETAILS" /> <category android:name="android.intent.category.DEFAULT" /> </intent-filter> </activity> -
In your
MainActivity, add a Button to launch the starting Activity -ReceiptListActivity:button.setOnClickListener(new View.OnClickListener() { @Override public void onClick(View v) { startActivity(new Intent(Actions.Receipt.getReceiptListAction(MainActivity.this))); } });
Theme Customization
The Kits leverage on Android’s support for Styles and Themes. Overriding Styles and Themes per Widget, Activity, or Application can change the app’s appearance. To read more about this, please visit our Styles and Themes document.
Layout Customization
Customizing Layouts via XML
You can customize the layouts of the different screens in the Receipts kit by copying the layout XML’s and overriding as desired. To read more about this, please visit the Layout Customization via XML document. The XML’s used are:
activity_receipt_details- layout used for displaying receipt detailsactivity_receipt_list- container layout used for displaying receipt listactivity_submit_receipt- container layout used for submitting receiptfragment_submit_receipt- layout used for uploading photo and submitting receiptlist_item_receipt- layout used for displaying each item in receipt list
Customizing Layouts via Code
There are certain cases that you may want to use a highly-customized layout for an Activity. To read more about this, please visit the Layout Customization via Code document. The classes used for the Receipt kit are:
ReceiptListActivity- host activity that includeReceiptListFragmentReceiptListFragment- for displaying Receipt page with list of ReceiptsReceiptDetailsActivity- for displaying details of a ReceiptSubmitReceiptActivity- host activity that includeSubmitReceiptFragmentSubmitReceiptFragment- for displaying submit page with views for uploading photo
Customizing Handlers
There are certain cases that you may want to change the default behavior of an Activity or Fragment. You can achieve that by extending the class that you want to customize and override as necessary.
Handlers may occur in different places:
- Adapters - for lists
- Member variables inside Activities or Fragments
- Member variables inside custom Widgets - for stand-alone custom Widgets
To start with, you may look at the classes mentioned in Customizing Layouts via Code, along with ReceiptAdapter, which is used for displaying list of Receipts.
Fully Custom UI
If changing the layout does not meet the requirements of the app, you may want to create your own challenge activity. The following are the methods you can use from the ReceiptAPI class:
Querying Receipts Data
getReceipts(ReceiptParams receiptParams, boolean clearCache, ListenerModel<BaseModel<Receipts>, Receipts> listener)

getReceipt(ReceiptParams receiptParams, boolean clearCache, ListenerModel<BaseModel<Receipt>, Receipt> listener)
Submitting Receipt
submitReceipt(MediaFile receipt, ReceiptParams receiptParams, ListenerModel<BaseModel<Receipt>, Receipt> listener)
